The beauty of Azure is that it has multiple ways to do the same thing. Imagine the scenario; you need to copy the database between subscriptions. Considering the SQL Server Import/Export procedure, you can do that either from the UI or use command line tools (like SQLPackage).
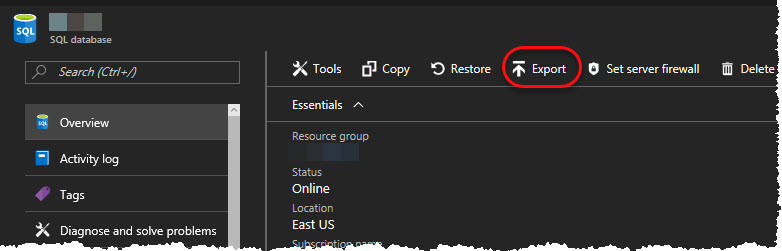
The way it works with Azure UI, you go to the SQL Server database you want to export, and you have an option available (circled in red below). It will export the database to the selected Blob storage (you need to have a storage account created prior to this operation in the same subscription).
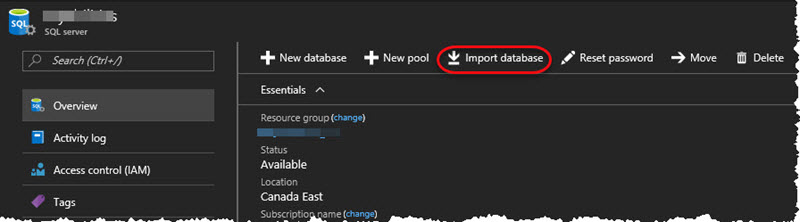
In the case of the same subscription but different SQL Server instances (or if your Azure subscriptions belong to the same tenant), you can Import this database (the actual *.bacpac file) using the same storage account, as it will be visible for all of them. If these are two completely different subscriptions, but you still need to Export/Import this database, you may need to create a storage account in the second subscription and import it from there. For the purpose, go to the SQL Server instance, and you will see the “Import database” option as highlighted below:
To import a database, you need to select the file (*.bacpac) from the storage account and pricing tier (along with collation, admin name, and password).
TIP: When you download the database backup file (*.bacpac) from the storage account, it will appear as a zipped archive. No worries about that, as the bacpac file is a zip archive in reality.
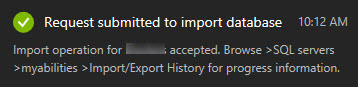
There is nothing wrong with this approach, but in this case, the import procedure takes quite a long time (as for me) for small databases and much longer for larger ones. The import process is hidden from the user, and the only message you will receive is that “Request is submitted to import database”:
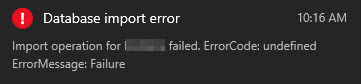
You can control it to some extent by clicking the “Operations” tile on the same page below (that is called “Import/Export history”), but it doesn’t update in real time. The error messages (if you would have any) are not that informative as well:
If you need to perform the same task quicker, automate it in the script (using PS or Azure CLI), or add more visibility into the process, the right way to go is to use SQLPackage command-line utility.
As stated in the documentation, to Export/Import using the SQLPackage utility, you can use the relevant parameters and properties. The utility should be installed on your machine if you used SQL Server Management Studio (the latest one) or Visual Studio Tools for SQL Server. You can also install it directly from the MS website here.
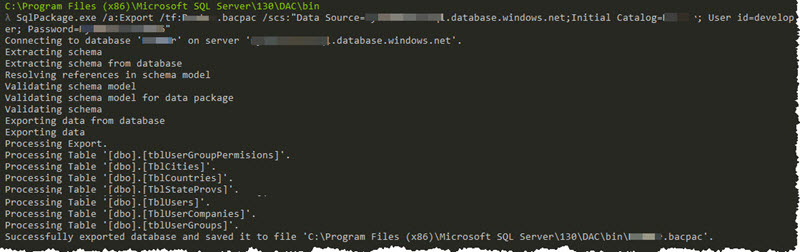
The command to Export the database I have used is quite simple:
Code:
SqlPackage.exe /a:Export /tf:<filename>.bacpac /scs:"Data Source=<server name>.database.windows.net;Initial Catalog=<database name to export>; User id=<user id>; Password=<password>"
TIP: You can find the SQLPackage util using the following path: “C:\Program Files (x86)\Microsoft SQL Server\<version>\DAC\bin”. If you will be using the util from there, the exported file will be dropped into the same directory. The better way is to add SQLPackage.exe to the Path in the Environment variables, so you can call it anywhere using the command line.
The import operation is as simple as export. Please find the code below:
Code:
SqlPackage.exe /a:import /tcs:"Data Source=<destination server name>.database.windows.net;Initial Catalog=<db name>;User Id=<server admin>;Password=<admin password>" /sf:<file name>.bacpac /p:DatabaseEdition=Standard /p:DatabaseServiceObjective=S1
It is worth mentioning that the *.bacpac will be picked from the same directory where SQLPackage.exe lies (unless you used the tip above). “User Id” and “Password” should be SQL Server admin’s credentials in Azure. Database edition corresponds to SQL Server editions (the full list of possible values: Basic|Standard|Premium|Default), the same parameters can be found in the documentation mentioned above. Database Service Objective corresponds to SQL Server pricing tiers. Possible values are: Basic, S0-S3 (Standard tier), P1/P2/P4/P6/P11/P15 (that belong to Premium tier), PRS1-2/4/6 (IO and compute-intensive instances, still in preview).
Like it was mentioned before, this way is quicker and gives you more control and visibility over the process. The error messages are more informative in this case as well:

So, using these two simple commands, you can Export/Import a database for the same or different Azure subscription without the overhead and automate the process if necessary, or use SQLPackage as part of your script for some other tasks.
Comments