If you're a computer vision enthusiast or a deep learning practitioner working on pose estimation tasks, you'll know that leveraging the power of GPUs can significantly accelerate your computations. However, setting up the required software stack can be a daunting task, especially on Windows machines. In this post, we'll walk through the steps to install CUDA Toolkit, cuDNN and TensorRT on a Windows 11 laptop with an Nvidia graphics card, enabling you to unleash the full potential of your GPU for Computer Vision Python routines.
The CUDA Toolkit provides a development environment for creating high-performance GPU-accelerated applications, including libraries, debugging and optimization tools, and a runtime library. This toolkit should be installed first.
Step 1: Check GPU Compatibility Before we begin, ensure that your Nvidia graphics card supports CUDA. You can check this either by visiting the Nvidia CUDA GPUs page and verifying if your GPU model is listed or by running the following CLI command:
nvidia-smi
As a result, you should see the following output if CUDA is supported:
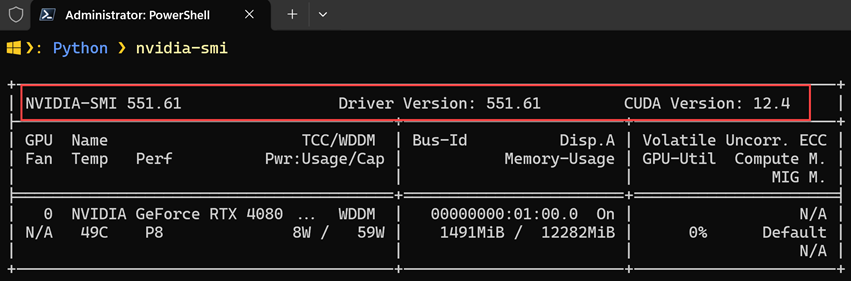
Step 2: Download and Install the CUDA Toolkit. Head over to the Nvidia CUDA Toolkit downloads page specified and select the appropriate version for your system configuration (I went ahead with 12.4.0). When on the website, choose the correct OS architecture (x86_64) and the OS version (e.g. 11). After successful installation, add CUDA lib and bin paths in our Environment Variable Path. Check the installation by executing the following command (may require CMD restart):
nvcc -V
The output will be something like this:
nvcc: NVIDIA (R) Cuda compiler driver
Copyright (c) 2005-2024 NVIDIA Corporation
Built on Tue_Feb_27_16:28:36_Pacific_Standard_Time_2024
Cuda compilation tools, release 12.4, V12.4.99
Build cuda_12.4.r12.4/compiler.33961263_0
Step 3: Download and Install cuDNN. cuDNN (CUDA Deep Neural Network Library) is a GPU-accelerated library of primitives for deep neural networks. It provides highly optimized implementations of standard routines such as forward and backward convolution, pooling, normalization, and activation layers. To install cuDNN, follow these steps:
- Visit the Nvidia cuDNN downloads page and select the version that best matches your CUDA Toolkit installation (I went ahead with v8.9.7 for CUDA 12.x)
- Download the cuDNN library for Windows by choosing the appropriate installer (i.e., 'Local Installer for Windows (Zip)')
- Extract the downloaded files and copy the contents of the extracted folder to your CUDA Toolkit installation directory. In other words, copy files from the cuDNN bin folder to the CUDA bin folder, copy files from the cuDNN include folder to the CUDA include folder, and lastly, copy files from the cuDNN lib folder to the CUDA lib folder.
NOTE: In Windows 11, CUDA Toolkit can be found by the following path: 'C:\Program Files\NVIDIA GPU Computing Toolkit\CUDA\v12.x'
Step 4: Install TensorRT. TensorRT is a Nvidia library that optimizes deep learning models for inference, providing significant performance gains. Download the appropriate TensorRT version from the Nvidia website and follow the installation instructions. I went ahead with 'TensorRT 8.6 GA for x86_64 Architecture' and selected 'TensorRT 8.6 GA for Windows 10 and CUDA 12.0 and 12.1 ZIP Package'. After unzipping the archive, do the same procedure we did in the previous step, i.e., copy all dll files (DLLs only!) from the TensorRT lib folder to the CUDA bin folder.
Step 5: Set up Python Environment Create a new Python environment using your preferred tool (e.g., venv) and install the necessary packages, including TensorFlow, OpenCV, and other Computer Vision libraries you plan to use.
Step 6: Install TensorRT, Graphsurgeon, UFF, and Onnx Graphsurgeon. Once Python's virtual environment is initialized, we can proceed with installing other dependencies using 'wheel' (or '.whl') files. You can grab these from the archive that contains TensorRT:
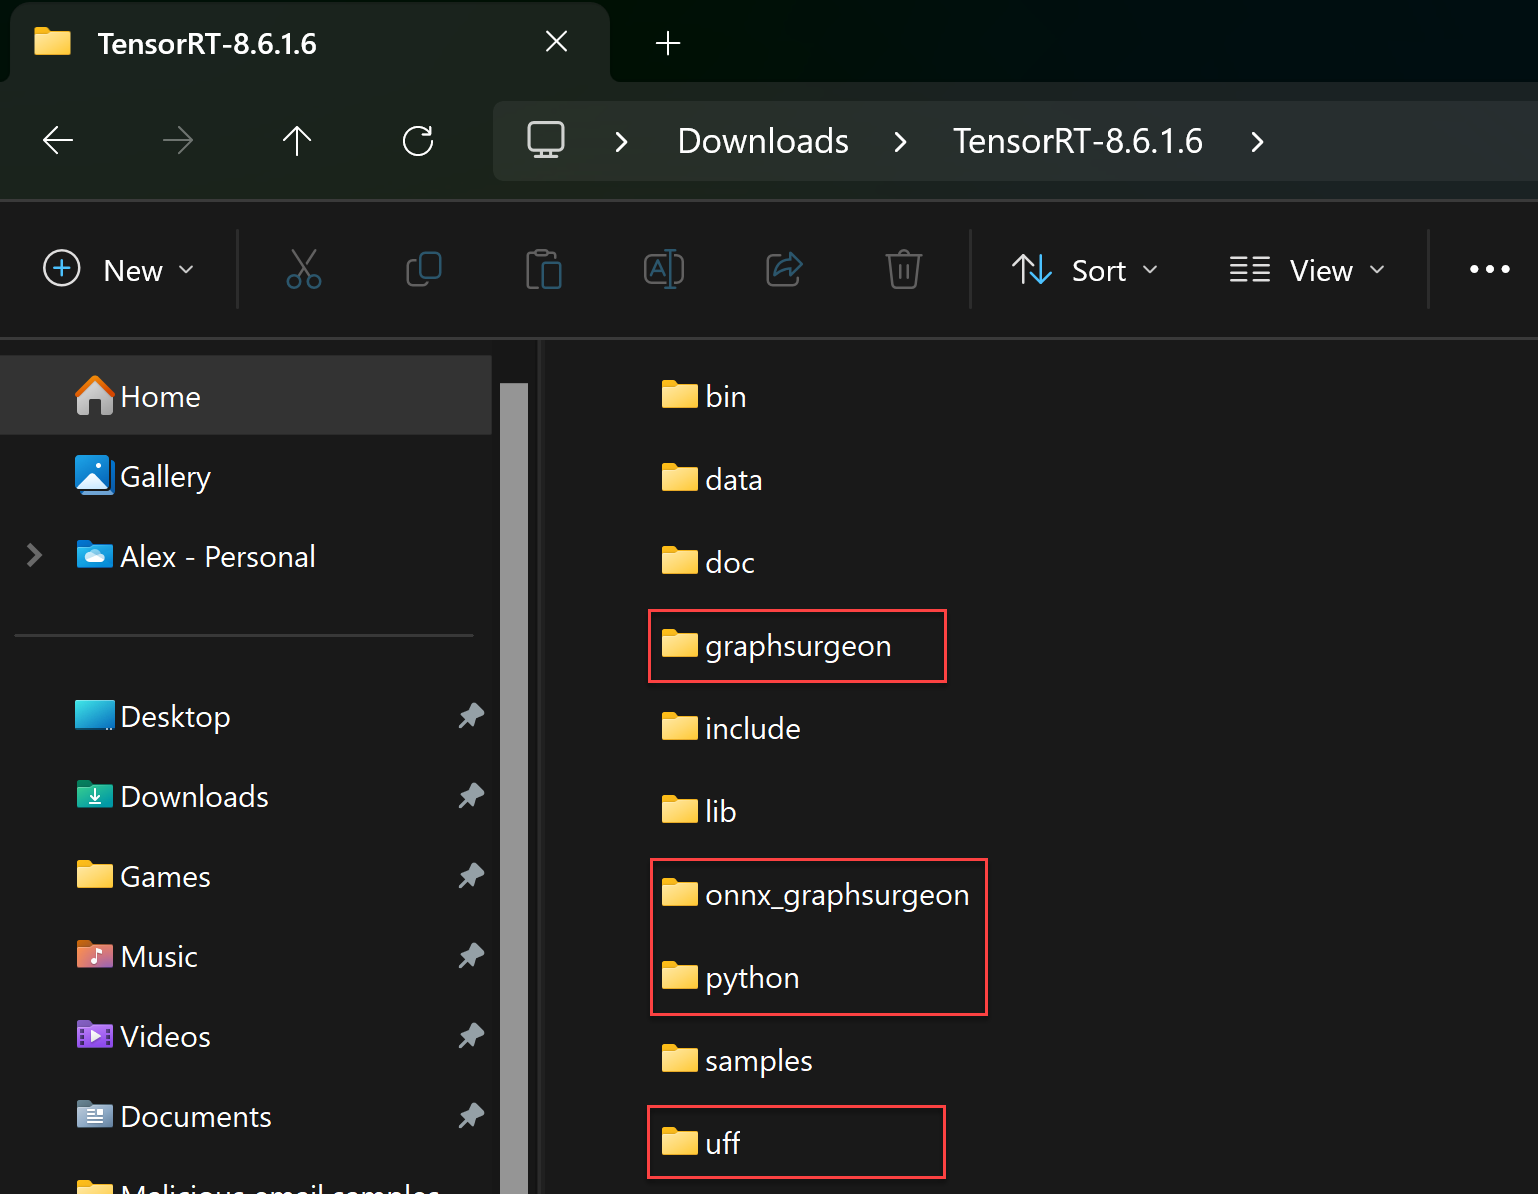
Move to respective directories one by one, and install all these with Python pip:
python -m pip install tensorrt_dispatch-8.6.1-cp311-none-win_amd64.whl
python -m pip install tensorrt-8.6.1-cp311-none-win_amd64.whl
python -m pip install graphsurgeon-0.4.6-py2.py3-none-any.whl
python -m pip install uff-0.6.9-py2.py3-none-any.whl
python -m pip install onnx_graphsurgeon-0.3.12-py2.py3-none-any.whl
Step 7: Install PyTorch for CUDA PyTorch is an open-source machine learning library widely used for computer vision, natural language processing, and other deep learning applications. It provides a seamless integration with CUDA, allowing you to harness the computational power of your GPU for training and inference tasks.
To install PyTorch with CUDA support, follow these steps:
- Visit the PyTorch website and navigate to the "Get Started" section
- Select your operating system (Windows), package manager (Pip), and CUDA version (matching your installed CUDA Toolkit, i.e., 12.x)
- Copy the provided pip install command, which should look something like this:
pip3 install torch torchvision torchaudio --index-url https://download.pytorch.org/whl/cu121
PyTorch is a powerful tool for computer vision tasks, offering a comprehensive set of libraries and utilities for building, training, and deploying deep learning models. Its seamless integration with CUDA allows you to leverage the computational power of your GPU, significantly accelerating the training and inference processes.
PyTorch provides the torchvision library for computer vision applications, which includes pre-trained models, datasets, and utility functions for common computer vision tasks such as image classification, object detection, and image segmentation. Additionally, PyTorch offers a flexible and intuitive interface for building custom neural network architectures, making it a popular choice for researchers and developers working on cutting-edge computer vision techniques like pose estimation.
Step 7: Verify Installation. To ensure that CUDA, TensorRT, and PyTorch are correctly installed and accessible from your Python environment, run a simple test script that shows their versions:
import torch
print(torch.backends.cudnn.version())
print(torch.version.cuda)
The CUDA Toolkit, cuDNN, and TensorRT form a powerful software stack that enables efficient deep learning development and deployment on GPUs. CUDA provides a parallel computing platform and programming model, allowing developers to leverage the computational power of Nvidia GPUs for general-purpose computing. cuDNN, on the other hand, offers optimized deep learning primitives, significantly accelerating the training and inference of neural networks. TensorRT further optimizes deep learning models for inference, delivering low latency and high throughput for deploying models in production environments.
At the same time, with PyTorch installed and properly configured with CUDA support, you can take advantage of GPU acceleration for your computer vision projects, enabling faster training times and real-time inference capabilities. Whether you're working on pose estimation, object detection, or any other computer vision task, PyTorch and CUDA can significantly boost your development workflow and model performance.
By harnessing these tools, developers can build and deploy deep learning models, including computer vision applications like pose estimation, with unprecedented speed and efficiency, unlocking new possibilities in various domains.
Summary:
In this blog post, we covered the steps to install CUDA, cuDNN, TensorRT and PyTorch on a Windows 11 machine with an Nvidia graphics card. We also discussed the roles of these tools in fostering GPU processing and enabling efficient deep learning development and deployment. By following these instructions, you'll be able to leverage the power of your GPU for Computer Vision Python routines, such as modern pose estimation tasks. With the right software stack in place, you can accelerate your deep-learning computations and unlock new possibilities in the field of computer vision.
Like the article and enjoyed reading it? Buy me a coffee!
Happy coding! ;)